In this guide, we will discuss how to install MongoDB on a Windows machine and how to get started with MongoDB, such as creating a new database and a new user.
In this post, we will be using the MongoDB community server and Windows 10.
Downloading the MongoDB Community Server
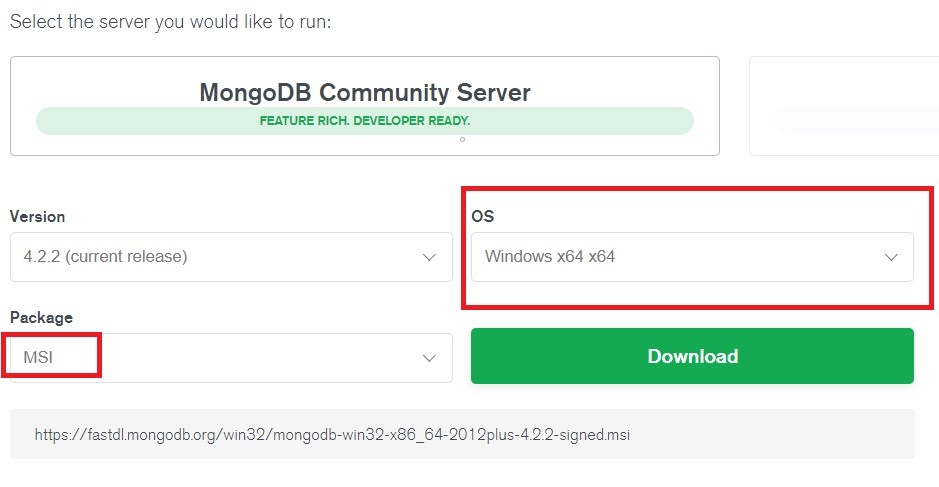
To download the community edition of the MongoDB server, you can visit the link below and choose your corresponding operating system. For ease of installation, I will choose the MSI package for download.
Link: https://www.mongodb.com/download-center/community?jmp=docs
Installing the MongoDB Community Server executable
Once the file has been downloaded, you can then proceed with installing it on your Windows machine. For this post, we will keep it simple by choosing the “Complete” installation.
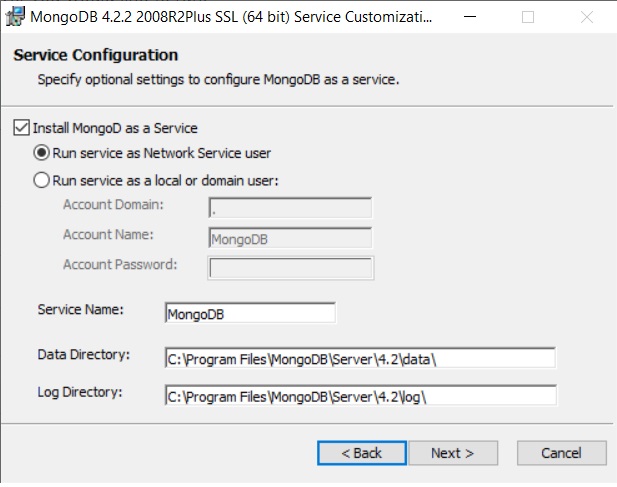
We will also run MongoDB as a service on our machine. However, if you prefer to run the MongoDB server using a specific Windows account, then you can edit the default settings and choosing the name and domain of the Windows user you would like to use.
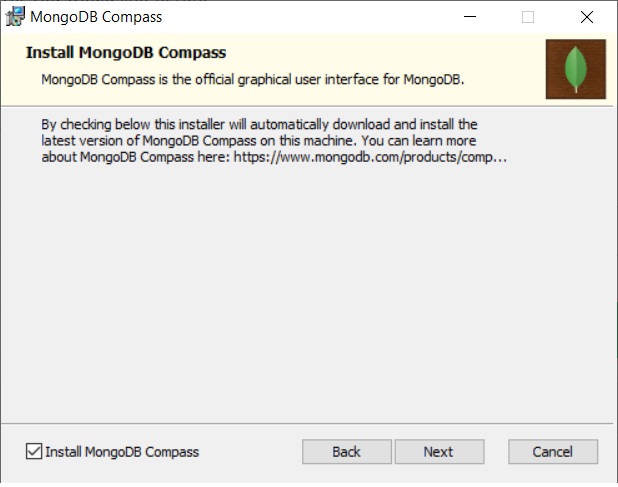
I would also highly recommend that you agree to install MongoDB Compass as we will be using it later in this tutorial. MongoDB compass is a GUI tool used to manage MongoDB instances and data. It also provides a nice interface for viewing the available data on your database.
Connecting to your local MongoDB server for the first time
Once everything has been installed, you can connect to your local MongoDB server instance. Simply launch the MongoDB compass application and in the new connections tab, click the connect button. This will work if you left the installation settings to their defaults.
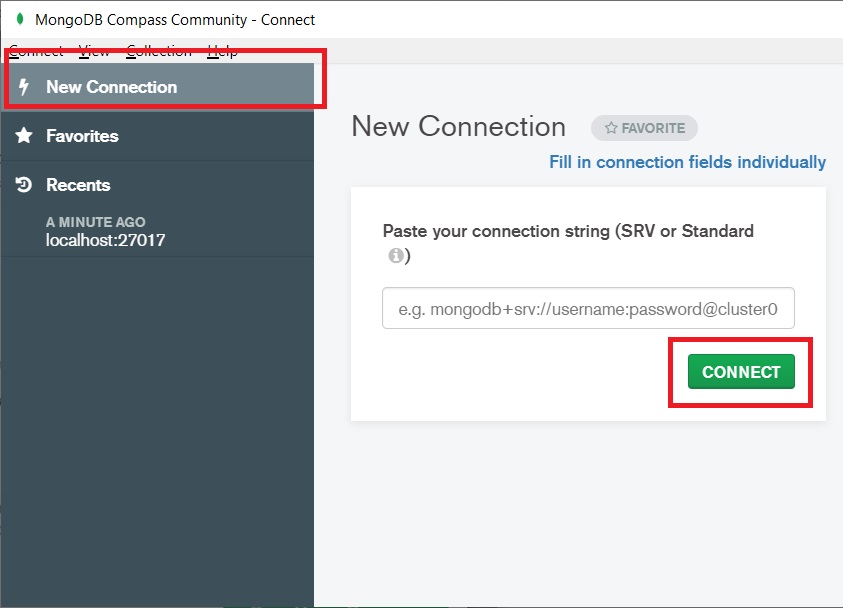
If you have changed the settings of your installation, then you can edit the connection parameters by clicking the Fill in connection fields individually. There, you can insert your connection parameters and settings.

You can also paste the connection string directly if you prefer.
Viewing available data
When you first connect to the MongoDB community server, you will find three databases installed by default.

The databases admin, config and local are installed by default on your MongoDB instance and each of them fulfill a specific purpose.
- Admin: The admin database is used to store authentication and authorization data for the instance such as user credentials, roles, etc. Please note that access management information is not confined to the admin database only. There are countless way to configure authorization, depending on your application’s architecture and needs.
- Config: The config database is used by the MongoDB engine for the management of the DB instance. It is discouraged to make changes in this database. If you are curious about the config database, then you can read more about it in this link: https://docs.mongodb.com/manual/reference/config-database/
- Local: The local database is used to store instance specific information, such as startup logs, results of command-line operations, etc. The database contains insightful information which could be used for debugging purposes. However, you will probably not need to modify its contents. You can read more about the database here: https://docs.mongodb.com/manual/reference/local-database/
As you can see, all the databases are empty except for the local database. You can go ahead and check the contents of the local database to see how the data in MongoDB is saved in JSON format.
Creating your first database
To create a database, you can simply use the create database button. You will then be prompted to insert the database name and a collection name.
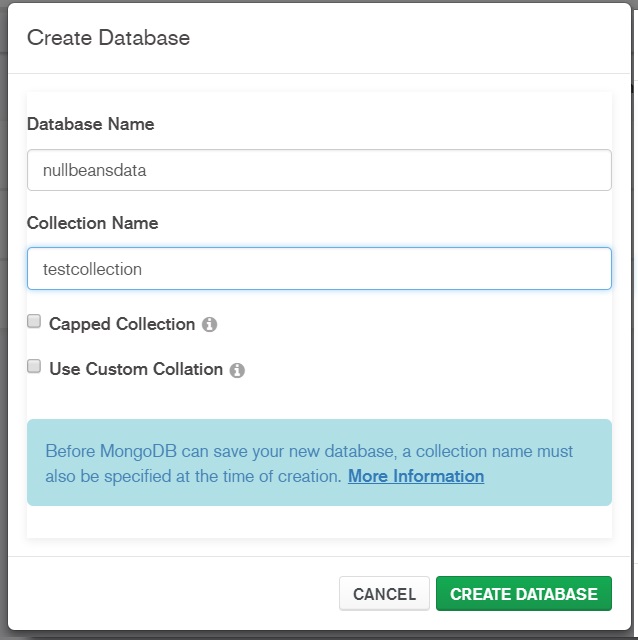
The reason why you need to insert a collection name is because MongoDB does not create empty databases. The database is created only once a collection is added to the database.
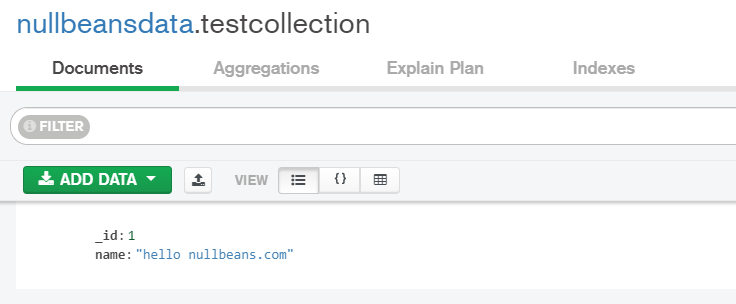
Go ahead and insert your database and collection names and click the “CREATE DATABASE” button. Once you have created your database and collection, click on the collection to open the data view. Since our collection is empty, it is time to add data to it. Let us start by creating a new document by clicking on “ADD DATA” -> Insert Document.
In there, you can paste the following contents:
{
	"_id": 1,
	"name": "hello nullbeans.com"
}
If everything went correctly, then you will see the data in the Compass UI as follows:
Congratulations, you have now created your first MongoDB database.
Creating a MongoDB user
As of the time of writing this article, it is still not possible to create users using the MongoDB Compass Community edition UI. Therefore, we will have to do it using the command line.
In order to enter the MongoDB command line, you will have to navigate to the mongo.exe file in your MongoDB installation directory. In my case, it was C:\Program Files\MongoDB\Server\4.2\bin. You can add the file to your system PATH variable in order to avoid having to navigate to the installation folder very time you need to run a command on your MongoDB instance.
PS C:\Program Files\MongoDB\Server\4.2\bin> .\mongo.exe
MongoDB shell version v4.2.2
connecting to: mongodb://127.0.0.1:27017/?compressors=disabled&gssapiServiceName=mongodb
Implicit session: session { "id" : UUID("38d9cd7b-df01-4642-8e65-a9a531609d28") }
MongoDB server version: 4.2.2
Welcome to the MongoDB shell.
For interactive help, type "help"....
You might see a warning that access control is not enabled on your instance. This is normal for new installations and should not affect the next steps in this tutorial. However, make sure to enable access control for production environments, otherwise your data will not be secure.
In order to add a new user, we will need to do two things.
- Selecting the database where the credentials will be stored. This is called the authentication database.
- Using the db.createUser method. In the method, we will choose the user’s username, password, and database. This is the database that the user has access to. It does not need to be the same as the authentication database.
An example of creating a user can look as follows:
> use nullbeansdata
switched to db nullbeansdata
> db.createUser(
... {user:"mynewuser", pwd: passwordPrompt(), roles: [{role: "read", db:"nullbeansdata"}]})
Enter password:
Successfully added user: {
        "user" : "mynewuser",
        "roles" : [
                {
                        "role" : "read",
                        "db" : "nullbeansdata"
                }
        ]
}
>
The passwordPromt() method allows you to enter the password without having it as a plaintext in the command line.
After you have run the command above, you will have successfully created a new user called “mynewuser” in the database “nullbeansdata” with access to the database “nullbeansdata”.
You can check for users that exist on a specific database by using the use <databasename> command and then calling the db.getUsers() method.
> db.getUsers()
[
        {
                "_id" : "nullbeansdata.mynewuser",
                "userId" : UUID("5eaddf3c-4682-436a-85ff-7733e7a487ee"),
                "user" : "mynewuser",
                "db" : "nullbeansdata",
                "roles" : [
                        {
                                "role" : "read",
                                "db" : "nullbeansdata"
                        }
                ],
                "mechanisms" : [
                        "SCRAM-SHA-1",
                        "SCRAM-SHA-256"
                ]
        }
]
You can gracefully exist the MongoDB command line by typing in the exit command.
> exit
bye
PS C:\Program Files\MongoDB\Server\4.2\bin>
Summary
In this post, we discussed how to install a MongoDB community edition server on Windows, how to create a new database and how to create a new user in your local database installation.
If you have any questions or comments, then please do not hesitate to leave a comment in the comments section below.
Leave a Reply
You must be logged in to post a comment.